29 Jun How to Set Up Conversion Tracking in Google Ads Using Google Tag Manager

For many companies, Google Ads can be quite frustrating to use. Google tends to make its UI too complex and to hide certain options.
This is none more apparent when setting up conversion tracking for a campaign. Once you set up your campaign, Google neglects to remind you or shows you how to track conversions.
So, how do you do it?
Google has at least tried to make this a little less painful, by integrating Google Tag Manager.
This article will explain how you can set up conversion tracking the right way.
All images used are for reference purposes.
Create Your Conversion Action in Google Ads
When you finish setting up a campaign conversion tracking should be the next thing you do.
Inside Google Ads, do the following:
- Click Tools & Settings
- Under Measurement, click Conversions
- Click the + button.
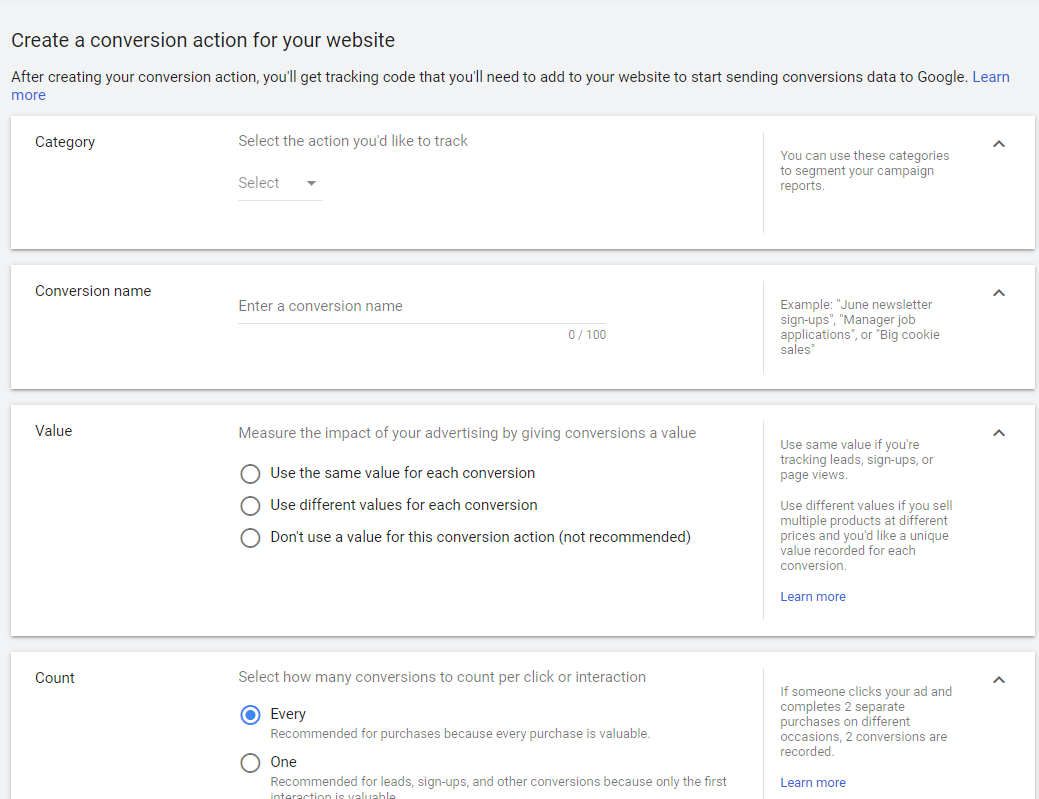
- Choose the type of conversion you want to track (in our example we would choose ‘Website‘.).
- Under Category, choose the conversion category.
- Enter a name for the conversion.
- If your conversion has a value enter it, choosing if you want to use the same value or different ones each time.
- Choose the count type for each conversion
Click Create and Continue
Set Up Google Tag Manager
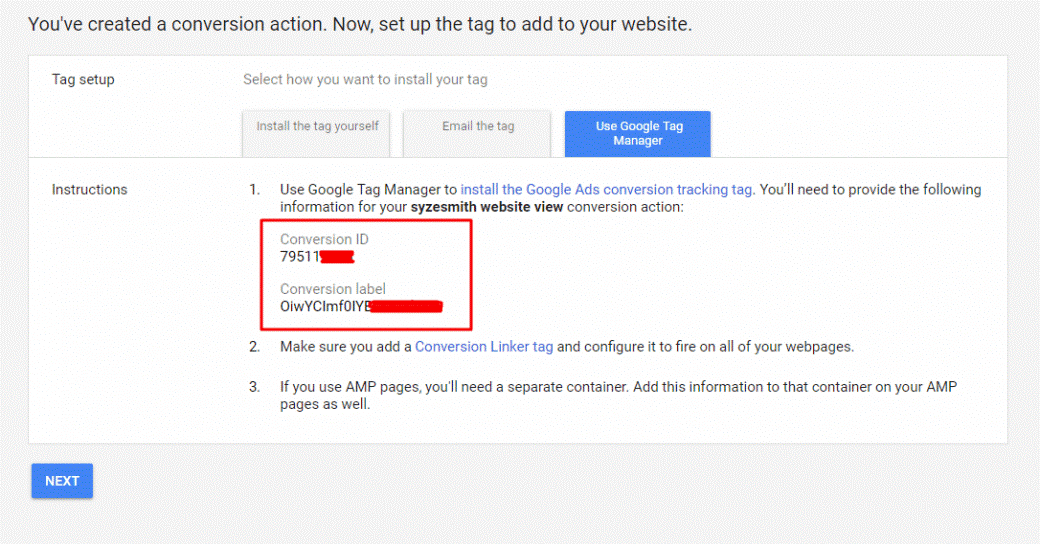
Here you have different ways you can put the tag on the website you want to track.
For this we will use Google Tag Manager. So, click that option.
Google Ads will display a conversion ID and label.
Now you fire up Google Tag Manager.
We will assume that you have never set up anything in Google Tag Manager.
- Click Create Account.
- Give your account a name.
- Enter a name for your container.
- Select the target platform (for our example, we would choose ‘Web‘).
- Click Create.
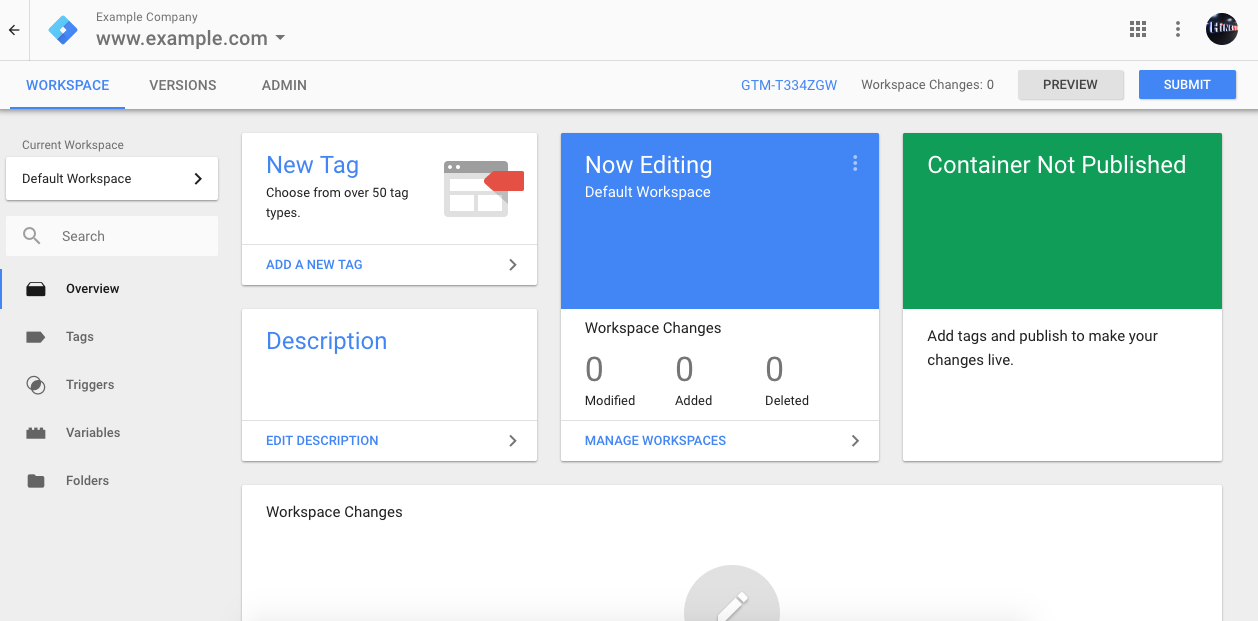
This will give your account a unique GTM number, like GTM-XXXXXXX.
Click that and the HTML code will appear.
You need to follow the instructions to add that code to your landing page in the right places.
Create Your Trigger and Tag
Now that you have created your account and container you are ready to create tags and triggers.
You want the conversion tag to trigger when something happens on your page.
First, add the conversion tag.
- Click Tags.
- Click New.
- Type a name for your tag.
- Click Tag Configuration.
- Click ‘Google Ads Conversion Tracking’.
- Enter your conversion ID and label from Google Ads.
- Click Triggering.
- Click +
- Click Trigger Configuration.
Here is where things get interesting.
For the sake of simplicity, let’s assume that you have a landing page selling a type of shoes.
You want to mark a conversion successful when someone clicks the page link to learn more about the shoes and can buy them.
First, you must enable the click URL variable in Google Tag Manager.
- Click Variables
- Click Configure.
- Make sure Click URL is selected.
Now let’s create the trigger.
- Click Triggers.
- Click New.
- Click Trigger Configuration.
- Under ‘Choose trigger type’ click Just Links.
- Under ‘This trigger fires on’ make sure ‘Some Link Clicks’ is selected.
- Set it up so that the trigger fires when Page URL contains the link to the product page on your landing page (this follows our example).
- Give the trigger a name and click Save.
Your Google Ads conversion tag is now set to trigger when the link on your landing page to the product page is clicked.
From that product page they can choose to buy the shoes.
The final step is to add a conversion linker to tie Google Ads to Tag Manager.
- Click Tags again.
- Click New.
- Click Tag Configuration and choose Conversion Linker.
- Click Triggering and click All Pages.
- Give your second tag a name, click Save.
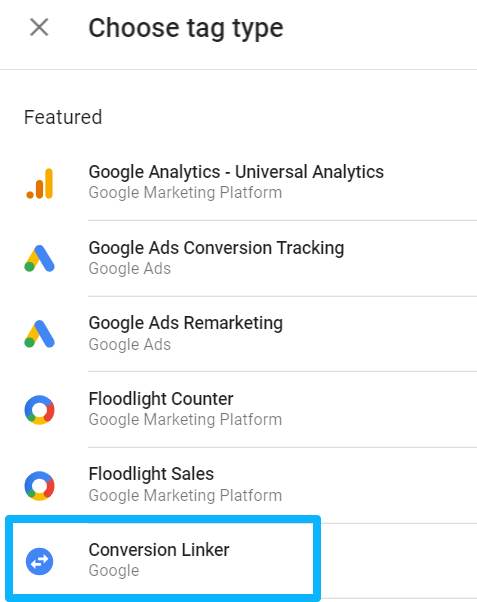
You should now have two tags and one trigger inside your Tag Manager account.
- Your Google Ads conversion tag.
- Your Conversion Linker tag.
- Your Google Ads conversion trigger.
Test Your Trigger and Tag
Install the Tag Manager browser extension from here.
This works on browsers such as Edge Chromium, Chrome etc.
Still inside Tag Manager, click Submit.
Give a name and description to your changes and click Publish.
Click Preview. This puts Tag Manager in preview mode.
In a new tab, go to your landing page where you installed the Tag Manager tag and do a hard refresh (CTRL + F5).
The Tag Manager browser preview window should appear at the bottom of your screen.
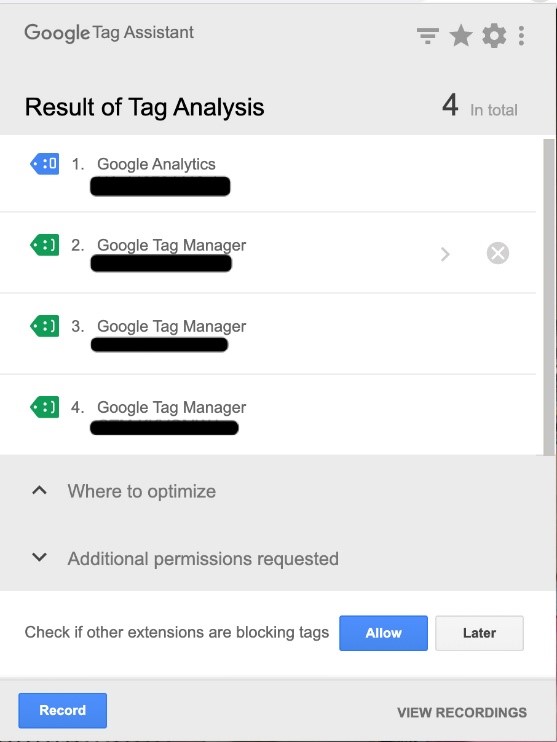
The Tag Assistant extension should be blue, and when you click on it, display your Tag Manager ID.
If setup the right way, it should turn green with a smiley face.
You should see under Summary of the Tag Manager preview pane, two sections.
Tags Not Fired
Here you should see the name of your Google Ads conversion tag.
Tags Fired
Here you should see your Conversion Linker and it should have fired 1 time.
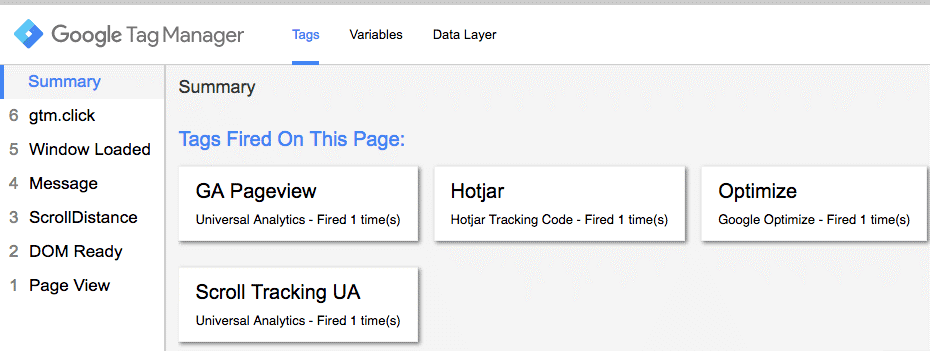
On your landing page, going by our example, we click the link that takes us to the shoe product page.
When we do that, we should see our Google Ads Conversion tag move from ‘Tags Not Fired’ to ‘Tags Fired’ and it should fire 1 time.
If that happens, everything is set up.
If not, make sure you have created the tags and triggers the right way in Tag Manager.
Make sure you have published everything.
Make sure that you added the Tag Manager code to your site in the right places.
Assign Your Conversion Action to Your Campaign
Say you have many campaigns.
It can get messy fast if you get 30 conversions in total, but you don’t know which campaign got which conversion.
That’s why you can set up individual conversion actions.
Following our example, you sell men’s shoes online.
You want to run campaigns on selling men’s shoes of different styles.
These are for boots, sneakers and sandals.
You have set up landing pages for each shoe style.
Each campaign is ready to go. You only need to track conversions.
Every new campaign is set to ‘Use the account-level ‘Include in Conversions’ settings.
That’s great if you have one campaign and one ad group.
But when you have more than one campaign it gets messy.
Imagine that you got 30 conversions in total for a campaign.
But what if you had to sell a certain amount of each?
What if it turned out to be 5 for boots, 20 for sneakers and 5 for sandals?
On the default conversion settings that campaign would have 30 conversions.
This gives you misleading data.
So how do we solve this?
We already created a conversion action and now we have to assign it to a campaign,
Google Ads will then optimize for those specific conversions for each campaign.
To do this, we go back to Google Ads.
- Under Campaigns, click the campaign you want to assign the conversion action to
- Click Settings.
- Click Additional Settings.
- Under Conversions, click the arrow to show the menu.
- Click Choose conversion actions for this campaign.
- Click Select Conversion Actions.
- Click your conversion article.
- Click Save and click Save again.
You have now assigned your conversion action to your campaign.
Let’s go back to our example.
Each campaign is for a different shoe type.
Each would have a different conversion action assigned to it.
Verify Conversions in Google Ads
Still inside Google Ads, go to Tools & Settings and under Measurement, click Conversions.
You should see the conversion action you created.
It may say ‘Unverified’.
This is normal because it can take up to 3 hours for Google to register the test conversion we did earlier.
Once set up your conversion status should change from ‘Unverified’ to ‘Recording Conversions’.
Setting up conversions is almost done.

There is one more step.
Segment Conversion Data
You may be wondering how you can view the number of conversions for each action in your account.
Under All Campaigns in the sidebar, click the campaign type (Search or Display).
In the menu, click Campaigns (with the home icon). This shows all your campaigns of that type.
Click Segment.
Click Conversions.
Click Conversion Action.
This will segment conversions by conversion action.
To view this data, click the arrow next to ‘Total: Account’.
You should then see all your conversion actions listed.
Information here includes the number of conversions for each conversion set (All Conv).
It also lists the total conversion value (if set) for each action set (All conv. value).
This is how you can set up conversions and track individual conversion actions.
If any of your conversion actions are not listed this is because they have had no conversions yet.
Once they get a conversion they will appear.
And that’s all there is to it.
Setting up conversion tracking and action sets for your campaigns is worth it.
Don’t let the hard work put you off.
You owe it to yourself to set it up the right way if you want to capture your campaign and conversion data the right way.

Get Your Business Online With Google Ads
Aware can get help supercharge your business, increase revenue, and reach new customers, with the power of Google Ads.
Let Aware manage the digital marketing for your business today!
- Boosting Workplace Efficiency with Microsoft365 Copilot in Thailand - January 31, 2024
- How to use the Google Datalayer to get your ecommerce data into Google Analytics - November 9, 2020
- How to Fix Common Google Shopping Issues - October 6, 2020
- How to perform A/B testing on your website using Google Optimize & Google Analytics - August 31, 2020
- How Using Heatmaps Can Help You Discover Hidden Ways to Increase Your Conversions in Google Ads - July 31, 2020
- How to Set Up Conversion Tracking in Google Ads Using Google Tag Manager - June 29, 2020
- Why Setting Up Remarketing in Google Ads Can Be the Quick Way to Success - June 29, 2020
- How to Get Started with SharePoint For Your Business Using Microsoft 365 - June 15, 2020
- Why Running a Google Ads Smart Campaign Is Not Always A Wise Choice - June 15, 2020
- How to Educate Your Work from Home Staff on Information Security - May 29, 2020
